QuickBooks database server manager is the core component that helps in establishing the connection between the host and workstations. The tool creates a Network data file on the server and on other systems working on the same company file. Without this file, no one can access QuickBooks in a multi-user environment. Therefore, It is one of the crucial elements.
- Many of you might not have knowledge of this tool. That’s why we have come up with this guide. Not only the tool helps you to access software in multi-user mode but also resolves all kinds of network issues. The file inside it does all the tasks to remove bugs from the system. Also, enable you to share the company file on more than one system. Different users get into the same network to access the QB file.
Well, it is just a quick brief of this tool. You must move into the guide to learn much more about it. Therefore, just get into the guide and learn how to conduct the QuickBooks database server manager download and installation procedure. You will be getting everything about the tool on this platform only. So, resolve all your queries forming in your mind regarding the file repair tool.
QuickBooks Database Server Manager: Introduction
The tool uses the same network to share the company file with multiple systems. The user can easily monitor the multi-user network through this tool. However, the access would become resisted if not using the database server manager. Various users acknowledge the tool as QB management software as it is highly responsible for managing the workflow of QuickBooks.
Moreover, the software creates a network data (.ND) file essential for data sharing among other computers. This software tops the list among all developed by Intuit. Its major function is to run and establish a network server on multiple computers. Every QuickBooks user must consider its use for running the QB file in different workstations.
Prerequisites To Follow Prior to Installation
- This software develops and keeps the network files data in the host server computer. In case you want to operate different QuickBooks versions then you are required to install both versions of Database Server Manager.
- When you go to install the different versions of QBs Database Server Manager then it will give the multiple versions processes only. It will not provide you with the different multiple versions of this software.
- It is recommended to install the different versions of this tool in descending order chronologically. This means that you need to install this tool in the order from the oldest to the latest.
- You will also have to assure yourself that all the services that are running in the windows interface are present in the QuickBooks DBXX.
- In case you add a newer version of QuickBooks, a new user account is created if you already have this tool in your system.
Also Read: How to Fix Quickbooks Error H202?How to Install QuickBooks Database Server Manager?
Below, we have given the step-wise procedure on how to install QBs Database Server Manager. Follow the steps and you will be ready to use it.
- From the official site of Intuit, download the setup of QBs Database Server Manager.
- After the download has been set up, from your mouse right-click on the wizard and start the process of installation.
- Exit all the applications and programs running in the system.
- In this window, you are required to first click on Next.
- Now, the terms and conditions window will be displayed. You have to go through all the terms and conditions and license agreement carefully and tap on the option I agree to the terms and license agreement.
- Again, tap on the option Next.
- Select the option Custom or Network.
- After this, choose the installation type.
- Hit on “I’ll be using QuickBooks on this computer And I’ll be storing” if you want to run the program in the computer system.
- Hit on “I will not be using QuickBooks on this computer” only if you want to store the data in the computer system.
- Click on the yes button and grant access.
- You have to type in the License number and Product number details now.
- Do as per the installation steps coming on the desktop screen and complete the process.
- When the installation is finished, you have to go through the mandatory steps for setting up the Database Manager.
QuickBooks Database Server Manager Update
We now know how to download and install the tool in your system. As you have installed this tool, you will be needing to update it many times. This will provide you with the best performance. So, we will now see the QuickBooks Server Manager update process.
- Firstly, you need to download the latest released version of the software via the online official site.
- As the installation is finished, you need to restart the computer system.
- When the servers get upgraded on the workstations, a text message will come on your desktop screen quoting Company File has to get updated to work in the system’s version of the QuickBooks Desktop.
- The updates have the capability of modifying the information and data stored in the QuickBooks company files. So, you will surely get a text message for creating a data backup.
- Now you can access the QBs company files after finishing the above process.
Usage of QuickBooks Database Server Manager
The tool aids the user in two ways:
- QuickBooks database server manager download and installation helps you to scan the QB files in multi-user environments.
- Also, find the bugs within the QB files through its scanning procedure.
Note: Make sure that you save the tool in a folder that contains other company files. This will enhance the performance of your software
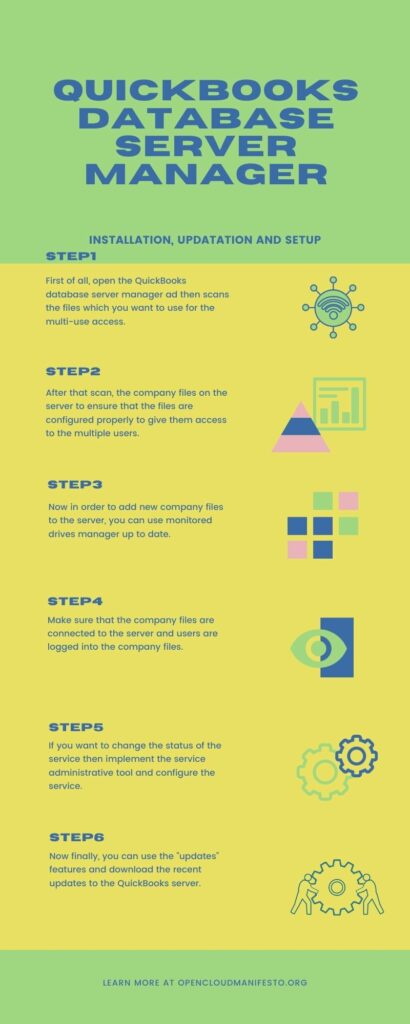
Step 1: Open QuickBooks Database Server Manager

The first step will be to open this software tool and read below how to do it.
- Access the start menu.
- In the Search field, write QuickBooks and tap Enter.
- Run the QuickBooks software and from the QuickBooks tool hub search for QuickBooks Database Server Manager.
- Tap on it and open it.
Step 2: Scanning the Company Files

The company files that are kept on the computer server will have to be scanned in order to grant access to the other users. For this, you must go through the following steps and do each and each step very carefully:
- After opening the tool, you will search for the tab Scan Folders and click on it.
- Now you are required to browse for the folder where the company files are stored. In case you don’t have this information then you can go for the option of scanning the entire disk.
- Lastly, tap on the option scan and you can now see the company files being scanned in the display section of the tool.
When the scan is finished, all the company files will be configured and can be used easily in the multi-user mode.
Step 3: Adding Folder

You are just required to click on the button Add Folder and then you need to select the folder that you want to add in there. A similar folder includes the company files of QuickBooks.
Step 4: Removing Folder

The user can delete any folder that he has added before by making use of the button Remove Folder present on the window.
Step 5: Scan Button

You can click on the button scan for scanning the folder and once the scanning is finished, you can see a list of QBs company files that are present in the specified folder.
Read: Resolve Quickbooks Won't Open Error [Troubleshooting Guide]Step 6: The Monitored Drive

- When you are adding new company files then, you can also use the Monitored Drive Feature that will assist you in keeping your QuickBooks Database Server Manager up to date.
- Firstly, access the QuickBooks software and then go to the QBs Database Server Manager.
- Now, reach out for the tab Monitored Drive.
- Tap on the option Remove and Rename. After this, go to Select for all the local drives that the user wishes to be monitored.
Solutions for errors related to QuickBooks DB server manager
When you are using the DB server manager, and there is an eruption of an error, then the following steps must be taken care of such as-.
Restart the QB DB server manager
When you set your system to restart, you can often resolve any glitch that might erupt in your system. But you have to take care of one thing: you have to restart the system that is hosting the company file.
So, one can follow the following steps to restart one system.
Condition 1- When on the server computer, both DB server manager and QB desktop are installed
- On the host computer, launch the QB desktop and then navigate to the file option. From there, click on the open or restore company option.
- Next, open your company file by hitting the tab to open it.
- Then click on the following icon, and then you can see a box asking to open the file in multi-user mode as an option to which you have to select.
- Later, sign in to your company file by clicking on the open icon.
- Then, on the server, you can close the company file using the logoff/ close company option.
- Finally, enter the database in the start menu and click on the run tab to execute the QuickBooks database server manager.
Read More: Resolve QuickBooks Payroll Error PS077Condition 2- If there is installation of only the DB server manager
- From the Windows start menu, click on the control panel icon.
- After tapping the administrative tools tab, select the services icon from the drop-down list.
- Press shift + F10 on the QBDBXX service, then click on the restart tab.
Conclusion
QuickBooks database server manager is one brilliant tool other than QuickBooks file doctor from QuickBooks software, this software assists the users in having a cutting edge by using the multi-user mode. The QuickBooks Database Server alters the network data file for the company files of QuickBooks. It is also called QuickBooks’ Database management software. In this article, we have brought together a wide range of information in a detailed manner including QuickBooks database server manager usage, and how to install and update it.
We have been quite pragmatic in our approach to blending all the different concepts in a single post. We hope you are satisfied with the content and found the information that you were looking for. If you want any more help, you can go through the other QuickBooks related posts on our official website.